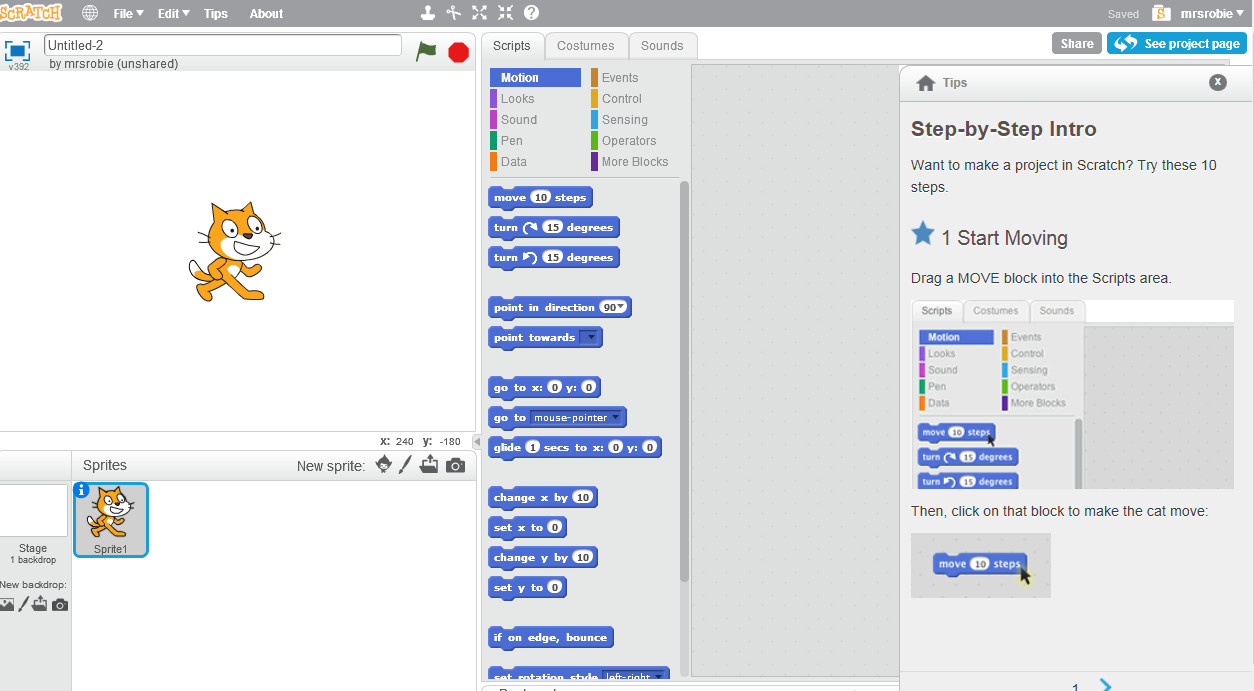
When the Scratch Project screen opens, you will see a cat on the
left, a list of blue blocks in the middle, a gray space on the right, and some instructions in a smaller window on the right
side. This is where you will learn how to program with Scratch.
The cat on the left side is called a Sprite. Eventually, you will learn how to create new Sprites and program
them to do anything you want! Sprites can be characters such as animals or people, they can also be objects.
The blue blocks in the middle of the screen have instructions on them. These
are your blocks of programming code. They are instructions that will make the Sprite do stuff.
The gray space on the right is where you place the blue blocks in order to activate
them. So you will use your mouse to click-and-drag the blue blocks to the gray space when you want to use them.
The instructions in the smaller window are there for now to get you started with this tutorial.
Go ahead and follow the instructions in that window to learn how to use the blue
blocks of code to make the cat move! If you aren't exactly sure what to do here, raise your hand. Mrs. Robie will
help you figure it out!


